Step 1: Finding Our First Email
Whitelisting an email address is pretty easy on the user’s end, but it takes a few steps to get it right.
Start by navigating to your Promotions folder, which is where you’ll likely find the first message.
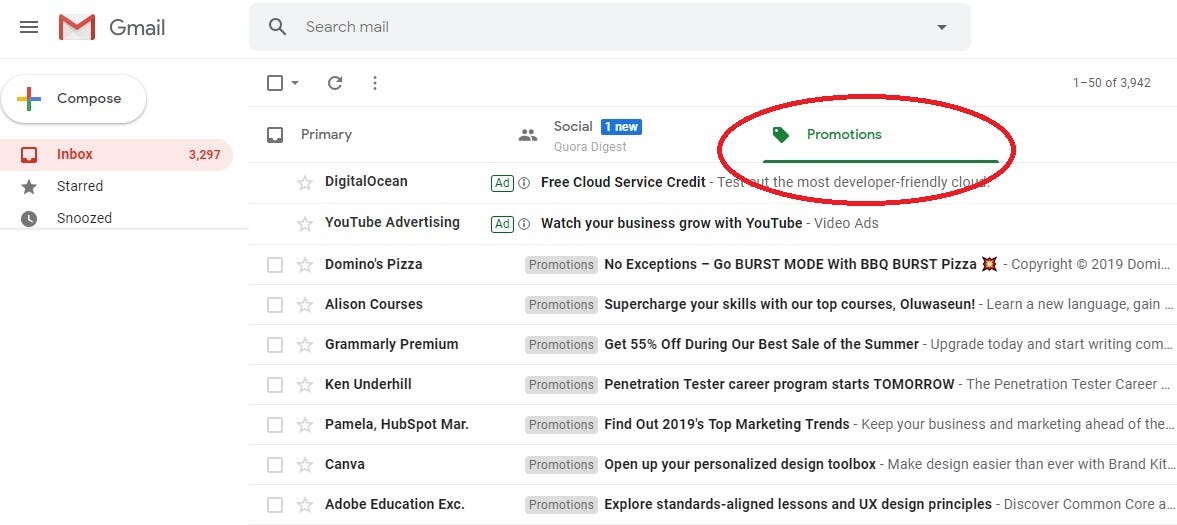
Look for the email from us.

If the email isn’t there, try your Spam folder.
Step 2: Confirm Your Email
Open the email and push the “to confirm your request, please click here” button:
This will prompt a second email to fire, which will give you access to the video you requested. 🙂
Step 3: Move the Email To Your Primary Inbox
This might not stop Gmail from sending these emails to the Promotions tab, though, so take one extra step. Go back to the Promotions tab or wherever you found the email you want to whitelist. Click on it and drag it into the Primary Inbox tab.
Gmail will ask if you want to send all emails from this sender to the Primary Inbox (click yes).

Step 4: Reply To Our Email!
The Google Overlords want to see that you’re engaging with the emails in your inbox. This helps us immensely, so we’d love it if you would snap off a quick reply to our email. It can be something as simple as, “I’m looking forward to watching” or “Thanks for sending this!” We appreciate you!
We can’t wait to share this content with you! Thanks for taking the time to make sure you get every piece of useful information.